Underwater Photography Glossary

Getting into the world of photography can often feel like venturing into a new country with a foreign language that you do not know. To help you mingle among professional photographers and feel like a fish in the water, we’ve come up with a guide on the most important photography terms. Some of them cover photography in general while others are specific to underwater photography since to be good at it, you should understand the basic terms as well. Even if you’re familiar with many of these terms, you can use this glossary as a reference when you need to refresh your knowledge.
Basic Photography Terminology
Angle of View (also field of view) describes how much of the scene will be captured by the camera’s sensor. The angle of view is measured diagonally and determined by the focal length of the lens (see definition below) and the type of camera’s sensor. For instance, if you use different lenses with the same-size sensors and same focal length, you will get the same angle of view. And vice versa, if any of the two parameters slightly differs, you will have a different angle of view.
Aperture is a measure that defines the size of the opening in the lens. The bigger the opening, the more light is captured by the digital sensor. Aperture is measured in F/Stops (e.g. F/4.5, F14). Smaller numbers represent larger lens openings (reversed with bigger numbers). Although the main function of the aperture is to control light, it is also used to set the sharpness of an image (depth of field): a smaller aperture (big number) will produce maximum sharpness while a larger aperture (small number) will create some blur around the subject. In underwater photography, it is important to use an aperture along with an external source of light to create a perfect balance between ambient and artificial light.
Depth of Field is the distance between the nearest and furthest elements in a scene that appear to be acceptably sharp. With a narrow depth of field, you’ll have only the object in front of the camera sharp and everything else behind this object will be blurry. On the contrary, a very wide depth of field, which is mostly used for landscape photography, will produce an image where everything is in sharp focus. In underwater photography, we use a narrow depth of field for macro images and a wider depth of field for large-angle images.
Exposure is a general term to describe the amount of light that is allowed to get onto the sensor of a digital camera. It is controlled by two parameters: Aperture (controlling how big/small the opening in the lens is) and Shutter Speed (controlling for how long the sensor is exposed to light). By manipulating these two parameters, you can adjust the light balance of your image. Images with little light are referred to as underexposed and images with too much light as overexposed.
Exposure Value represents all the available combinations of Aperture and Shutter Speed that result in the same level of brightness of an image. The EV+/- setting is used in automatic mode to adjust the exposure according to your needs. In manual mode, however, you need to play around with combinations of Aperture and Shutter Speed until you find your perfect balance.
Focal Length is a distance in millimeters between the lens’ optical center and the sensor. It determines the angle of view and magnification. The longer the focal length is, the higher the magnification is and vice versa. For example, with long focal lengths, you can fill the frame with subjects that are further away from your camera. The focal length is so to say the basic parameter you should consider when choosing a new camera since different types of photography require different ranges of focal length.
Histogram is a graphical representation of an image’s exposure. The dark tones are placed on the left side of the graph, while the light tones are found on the right side. Consequently, when the image is underexposed, the graph will be moved to the left side, and vice versa. A histogram is a very useful tool in UW photography, as oftentimes underwater lighting may mislead you so you are not able to properly determine the exposure from your LCD screen.
Macro Photography refers to a type of photography where you shoot from a very close distance with a ratio of 1:1 or larger. It means that the subject in your image is the same or bigger than it is in real life. To reach this effect, photographers use macro lenses with very long focal lenses, e.g. 50, 60 mm, or even 100, 105 mm. The macro technique is the best one for underwater photography, as there is little water between you and the subject, which reduces the color loss caused by water properties. However, you should keep in mind that such close proximity to the subject compromises the depth of field making it really shallow. You can compensate for this by using the smallest aperture possible.
Megapixel (MP) means one million pixels. A pixel is a tiny little square that builds up an image. If you zoom in on any image to its maximum, you will see that it consists of many little squares. In other words, pixels are tiny square bits of visual information. Megapixels are also used to measure the resolution of a digital camera or a phone camera. For example, a 24-megapixels camera means that this camera takes images with 24 million pixels in it. Thus, the more megapixels an image has, the better is the quality but also the larger is the size.
Stop is a measurement of light used when defining exposure. You can see the scale of “stops” on your camera screen when shooting in manual mode. Zero stop, which is placed in the middle of the scale, means perfect exposure. If the indicator moves towards “+”, the image is most likely overexposed, while “-” stops hint that the scene is underexposed. Each next “stop” means twice as much light as the previous one.
White Balance is one of the most important settings in underwater photography. On the surface, it is easier for your camera to find a white object and use it as a reference for building up proper coloration and producing accurately colored images. The whole thing gets complicated underwater since water serves as a natural blue filter reducing red colors. Consequently, the images get a blueish cast, which is a very common issue for underwater photographers. Just 20 feet below the surface, the red is filtered out completely. Normally, digital cameras adjust White Balance automatically. Underwater, however, you’ll need to come up with some workarounds. Here are a few things that will help you manage your camera’s White Balance:
- Use red filters.
- Shoot RAW and then adjust White Balance in post-production.
- Adjust it manually. For this, you will need to have a white object along with you. It does not have to be something sophisticated - a simple white dive slate will do. When shooting underwater, select Manual White Balance Mode, point it at your white object, and confirm changes. Note that whenever you change depth, you’ll have to readjust the White Balance, as the deeper you go, the more colors are filtered out.
Camera Features & Settings
Aperture Priority (Av) can be considered as a semi-manual mode. In this mode, you are in full control of Aperture, while your camera automatically sets the Shutter Speed, so that you get a perfectly exposed image in the end. In case you do not have an external strobe when shooting underwater, feel free to use this mode to determine the correct exposure.
Automatic Exposure is a general term that can be used in regards to Aperture Priority, Shutter Speed Priority (see below) and programmed Auto Exposure. Many cameras have a separate button called AE-L (Automatic Exposure Lock) that allows you to lock already calculated AE and take multiple pictures with the same setting. If your camera does not have such a button, try pressing the half shutter button, or refer to your camera’s manual in case you are unable to find it.
Flash / Strobe is an artificial source of light widely used in photography. In low-light conditions, which are common in underwater photography, a strobe is a must-have tool as it produces a day-like light - the best compensation possible for the color loss caused by water properties. A remark: in underwater photography, terms flash and strobe are often used interchangeably.
Flash/Strobe Exposure Compensation allows adjusting the level of illumination provided by the flash without changing the exposure. It is used to compensate for the flash output when the flash is used in Auto or TTL mode. If you need to darken the water background by reducing the ambient light when shooting in Auto/P/Av or Tv, Strobe Exposure Compensation is your best option.
Focus is the process of making adjustments to the lens to find the maximum resolution, sharpness, and contrast for the chosen subject. There are a few types of focus:
- Automatic Focus (AF) - the camera configures the focus automatically by using a combination of a sensor, a motor, and a control system.
- Manual Focus (MF) - allows you to manually adjust the focus by using a dial located on the front of your camera.
- Focus-Assist (Light) - sends out a flash of light to lighten up the subject in low light conditions. In underwater photography, it is common to use an external focus light, as most cameras do not focus well here.
ISO is an additional parameter to set up a correct exposure. Basically, by adjusting ISO you specify the sensitivity of the sensor to light. Higher ISO means higher sensitivity, thus less light is needed to provide proper exposure and vice versa. That being said, brightening a photo via ISO has consequences. An image taken at too high of an ISO will show a lot of grain, also known as noise.
Live View (in DSLR cameras) is a feature that allows you to use your electronic display as a viewfinder, instead of looking in a small eyepiece to see the scene in a frame before making a shot. The only downside of this mode is that it can slow down your camera substantially. However, new DSLRs are getting better and better in this regard, so it may cease to be an issue in the near future.
Manual Mode (M) places the correctness of exposure in your hands. This means that you have to find a perfect combination of aperture and shutter speed for each scene. It is important to note that even the slightest change of the scene may require a new exposure as light may fall differently at each new angle. The Manual Mode gives you much space for your creative side. It may be difficult in the beginning to get a hang of it, but all you need to do is experiment with different setting combinations in various light conditions. Moreover, Manual Mode is a must for shooting underwater, as most of the automatic settings do not perform well there.
NR (Noise Reduction) is a technology that helps to reduce noise where there should be none.
Rear Curtain Sync means that the flash is fired at the end of the exposure, just before the shutter closes, or at the rear curtain. It may be a creative effect when the subject of your photograph moves, as rear curtain sync creates sort of a ghost trail behind the subject.
Shooting Mode is a general term for a mode in which your camera currently works. Every camera has a certain set of modes that are specific to different shooting conditions: e.g. Portrait, Landscape, Sport, Night, Manual, etc. All modes except Manual have some built-in presets that are aimed to help you out in particular lighting situations.
Shutter generally refers to the button on top of your camera that you press to take a picture. It is a mechanical part of your camera placed behind the lens and right before the sensor, which opens and closes to control how long the sensor is exposed to light.
Shutter Priority (Tv or S) is another semi-manual mode, in which you fully control the shutter speed, while the camera adjusts the aperture accordingly.
Shutter Speed is a setting of a camera that controls the duration between the opening and the closing of the shutter, consequently, determining how long the sensor is exposed to light. Higher shutter speed (the shutter closes very fast) is used to catch slight movements, whereas lower shutter speed produces more blurry images. As the movement is slower underwater, lower shutter speeds are commonly used in underwater photography.
VR (Vibration Reduction) is a technology that reduces camera shake. It can be handy when you are shooting while moving.
TTL (an acronym for Through The Lens) is a type of built-in light meter that "calculates" the brightness of the scene directly through the lens. The most important advantage of this method is the automatic calculation of all the factors affecting exposure, thus its high accuracy. Some strobes also have TTL and can be put on auto mode providing as much light as needed for the correct exposure.
Accessories
Filter is an external attachment that is placed on your lens to correct some color issues or for creative purposes. In underwater photography, filters can play an important role when you need to compensate for the distortion of white balance caused by color loss. You can find different types of filters, such as:
- Color Correcting filters and especially red ones are very useful in underwater photography. Since water serves as a natural blue filter making your images blueish, red filters can correct these color distortions in a simple yet effective way.
- Intensifying filters magnify a certain color and can be a great tool for creating interesting pieces.
- Macro (diopter or close-up) filters can be a good and inexpensive substitute for a macro lens. As the oceans are full of tiny creatures, it is very common to use macro filters that let you get a quality image and keep your distance from the subject so you do not disturb marine life.
- Polarizing filters are mainly used for reducing glare and shiny reflection from horizontal surfaces like lakes, sea, wet roads, etc.
- UV and Skylight filters have no direct effect on your images, however, they are very useful as they absorb ultraviolet and reduce atmospheric haze, hence protecting the lens. Additionally, they preserve your lense from scratching, dust, moisture, fingerprints, and other physical damage.
Flash Diffuser is used as a tool to soften the usually harsh light produced by most flashes. As a result, the light becomes more even and spreads equally on the subject.
Lens is an optical system designed to create images of objects on a receiver of light energy, such as film, paper, or a projection screen. The viewing angle of an average lens is pretty much the same as that of a human eye. The most important parameter of a lens is its focal lens (defined in millimeters). There are quite a few different types of lenses, some of them are:
- Telephoto is a type of long-focus lens with a shorter physical length than its focal length. They are mainly used for shooting from a long distance, which makes them not suitable for underwater photography, as proximity to the subject is a key principle underwater.
- Wide-Angle lenses are called after their main function - to make deep and wide images thanks to the smaller focal length, larger depth of field, and excellent ability to focus from a close distance. All these properties make the wide-angle lenses perfect for underwater photography.
- Zoom lens is the most popular type of camera lenses since it offers a range of focal lengths in a single lens, unlike the prime lens that has only one focal length. Another good thing about these lenses is that they allow you to change focal length without changing the focus.
- Macro lens is used in macro photography, magnifying the subject in the way that other lenses are not capable of. Consequently, its main purpose is to focus on very tiny details making the subject look life-size or bigger in a frame than it is in real life. Just like wide-angle lenses, macro lenses are also very useful in underwater photography.
- Fish Eye lenses are very popular in underwater photography due to their extremely wide angle of view (up to 180 degrees). On the surface, they produce an often unwanted so-called fisheye effect (making the image look circular), which is reduced underwater leaving the lens to be just exceedingly wide-angled.
Lens Hood (Lens Shade) acts as a visor for your lens blocking unwanted glare and lens flare. It should perfectly match the size of your lens so that you do not get an undesirable vignette effect.
Formats
JPEG is the most popular file format, as it does not use too much memory. However, to compensate for this, JPEG format compresses up to 90% of the file’s data, which leads to considerable losses in the quality of the image. To minimize this effect, you can choose the highest JPEG setting with increased size and quality. In this case, the quality of your shot may look much better to you, but there might still be too much of a data loss for further post-production, e.g. resizing.
RAW file format does not compress a file at all. It also does not make any adjustments such as white balance correction, sharpening, exposure, etc. Basically, RAW captures the scene as it is without altering it in any way. This format is perfect for thorough post-production allowing you to make any corrections after the shot has been taken. For instance, the newer versions of Photoshop have a special mode specifically designed for RAW images, where you can find all the standard settings in one place.
Camera Types & Parts
DSLR (Digital Single Lens Reflex) cameras use a digital mirror system, which is placed in front of the sensor. The light goes through the lens and thanks to the mirrors gets to the optical viewfinder, where you can preview your future shot.
Mirrorless cameras do not have a mirror that is usually placed in front of the sensor. Consequently, there is no viewfinder either, which makes these types of cameras lighter than their DSLR counterparts.
Composition and Quality
Flare is usually an undesirable haze or starburst in an image, caused by unevenly scattered bright light. Generally, it is a result of improper composition, when too much bright sunlight (or artificial light) gets through your lens, hits the camera’s sensor, and spreads without focusing with the rest of the image.
Golden Rectangle (also referred to as golden spiral, golden ratio, or divine proportion) represents a rule of composition, which purpose is to construct the composition in such a way that will lead the viewer through the entire photograph making it more balanced and pleasing for the eye.
Exposure Latitude shows to what extent a photograph can be underexposed or overexposed and still look good. When shooting in a manual mode oftentimes you may have a feeling that you would like to add a bit more or less light than what your exposure meter shows as correct. And when you do so, the photo looks nice to you. It is another great way how the manual mode can give you more room for your creativity.
Monochrome is a technical term for “black and white”. Although the word monochrome is commonly understood as a “black and white” photograph, it can be used for varying tones of any other color as well.
Resolution can be described as image “Width x Height” in pixels or pixels per inch, which is basically a number and an order of visual information the image contains. Hence, a resolution of an image has a direct impact on its quality. The higher resolution, the better the quality, as the image offers more visual information in this case. Furthermore, the resolution depends on the lens and the sensor, which makes it an important parameter when choosing a new camera. As a rule, the resolution in cameras is indicated in megapixels (see the definition above).
Rule of Thirds is another technique designed for a more balanced composition. All you need to do is to divide a scene into three equal sections horizontally and three equal ones vertically (imagine two lines going horizontally and two ones vertically). It is commonly believed that if you put the main subject on any of the four resulting intersections, this position will be the most balanced one for the viewer’s perception.
Sunny-16 Rule is a simple way to determine correct exposure on a bright sunny day without a light meter. The rule of thumb goes like this: if you are shooting on a clear sunny day, set your aperture at F/16, and depending on your ISO, your shutter speed will be a reciprocal value of your current ISO setting (e.g. ISO - 400, then the shutter speed will be 1/400). This method was very popular in times of “black and white” film photography, but you can still use it. However, if the weather conditions change, the whole setting should be adjusted as well. There is another rule of thumb for this situation. If you increase your aperture by one stop, you should also decrease the shutter speed by one stop, in order to maintain the same exposure.
Tone is a degree of lightness or darkness in an image or it’s overall color temperature (warm/cold tones). It is another creative tool that you can use to give your shots an artful touch.
Vignette is a creative effect in photography that was quite popular in the past. There is still such an option in most of the post-production programs. In essence, it is an extreme underexposure of photograph corners. For instance, this type of underexposure can occur when your equipment does not fit properly. You can encounter this issue underwater if your lens port does not fit the lens.
Terms Specific to Underwater Photography
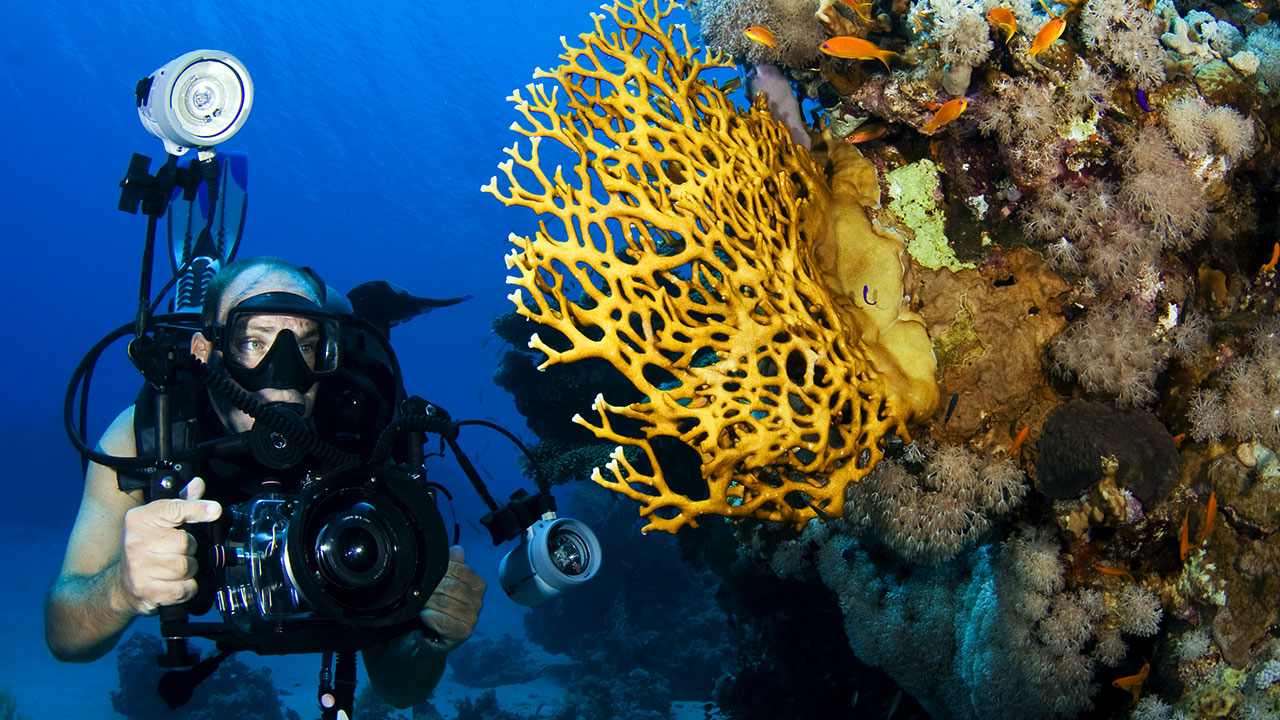
Camera Housing is used for underwater photography when the camera case does not have waterproof protection. This type of housing will waterproof and pressure-proof your camera. A special design allows you to fully control your camera while diving. Therefore, you need to make sure that the housing matches your camera perfectly.
Cold Shoe is a mount on top of the housing that holds an external focus light or strobe. The difference between the hot shoe and the cold shoe is that the latter does not have an electrical connection between the camera and the external light accessory.
Optical-fiber cable is the best way to connect a strobe to a camera’s built-in flash underwater, as it is waterproof. Originally these types of cables were designed to transmit electricity over a long distance, which makes them very dependable for underwater photography.
Wet Lens (especially wide-angle or macro lenses) is a key tool for your UW photography kit if you are using a compact or mirrorless camera. It can be attached on top of your housing or in front of your port and convert your fixed lens into a wide-angle lens allowing you to take nice wide-angle shots from a shorter distance.


I have recently purchased Divevolk SeaTouch 4 underwater case for iPhone 12. Anyone have some info or experience with this unit? I’m in Turks/C anxious to take pic of the wall?